There are some crafts that nearly every school child has tried out at least once in their life. You know exactly what I’m talking about—making long paper chains, folding paper boats, and the classic art of paper weaving.
For many of us, weaving colorful strips of construction paper into a placemat was a rite of passage in primary school. But little did we know back then that these simple activities were actually steeped in rich history. For instance, while we know paper folding as Origami (the Japanese art form), paper weaving has deep roots in various cultures, including intricate folk arts found in China’s Fujian Province and the woven “Julehjerter” hearts of Denmark. We were getting our first taste of international culture and geometry, and we didn’t even realize it!
Today, paper weaving remains one of the most accessible and beneficial activities for children. It requires minimal materials—usually just paper and scissors—but offers maximum developmental benefits.
In this guide, we will explore the benefits of this craft and then dive into 15 wonderful paper weaving activities for kids that range from beginner placemats to complex 3D art.
The Amazing Benefits of Paper Weaving for Kids
Why should you introduce paper weaving to your classroom or home? Beyond being a great “boredom buster,” the educational benefits are significant:
- Fine Motor Development: The pincer grasp required to pull a paper strip over and under is excellent for strengthening the small muscles in the hands and fingers. This directly supports handwriting skills.
- Pattern Recognition (Math Skills): Weaving is essentially a physical manifestation of patterns (A-B-A-B). Understanding how rows alternate is a foundational math concept.
- Hand-Eye Coordination: Threading a strip of paper through a tight slit requires the eyes and hands to work together in unison.
- Patience and Focus: Unlike instant-gratification digital games, weaving requires a rhythmic focus. It is a calming, meditative activity that teaches perseverance.
- Spatial Awareness: Kids learn how two-dimensional objects interact, understanding concepts like “behind,” “in front,” “top,” and “bottom.”
Getting Started: Tools of the Trade
The beauty of paper weaving is its simplicity. You don’t need expensive equipment.
- Paper: Cardstock is best as it holds its shape, but construction paper works well for beginners. You can also use recycled magazine pages for an eco-friendly twist.
- Scissors: Good safety scissors for the kids, and perhaps a craft knife (for adults only) to cut internal slits.
- Glue Stick: To secure the ends of the strips so the weave doesn’t unravel.
- Ruler: Essential for drawing straight lines to cut along.
15 Creative Paper Weaving Projects
We have arranged these from “Beginner” to “Advanced” so you can find the perfect challenge for your child’s age group.
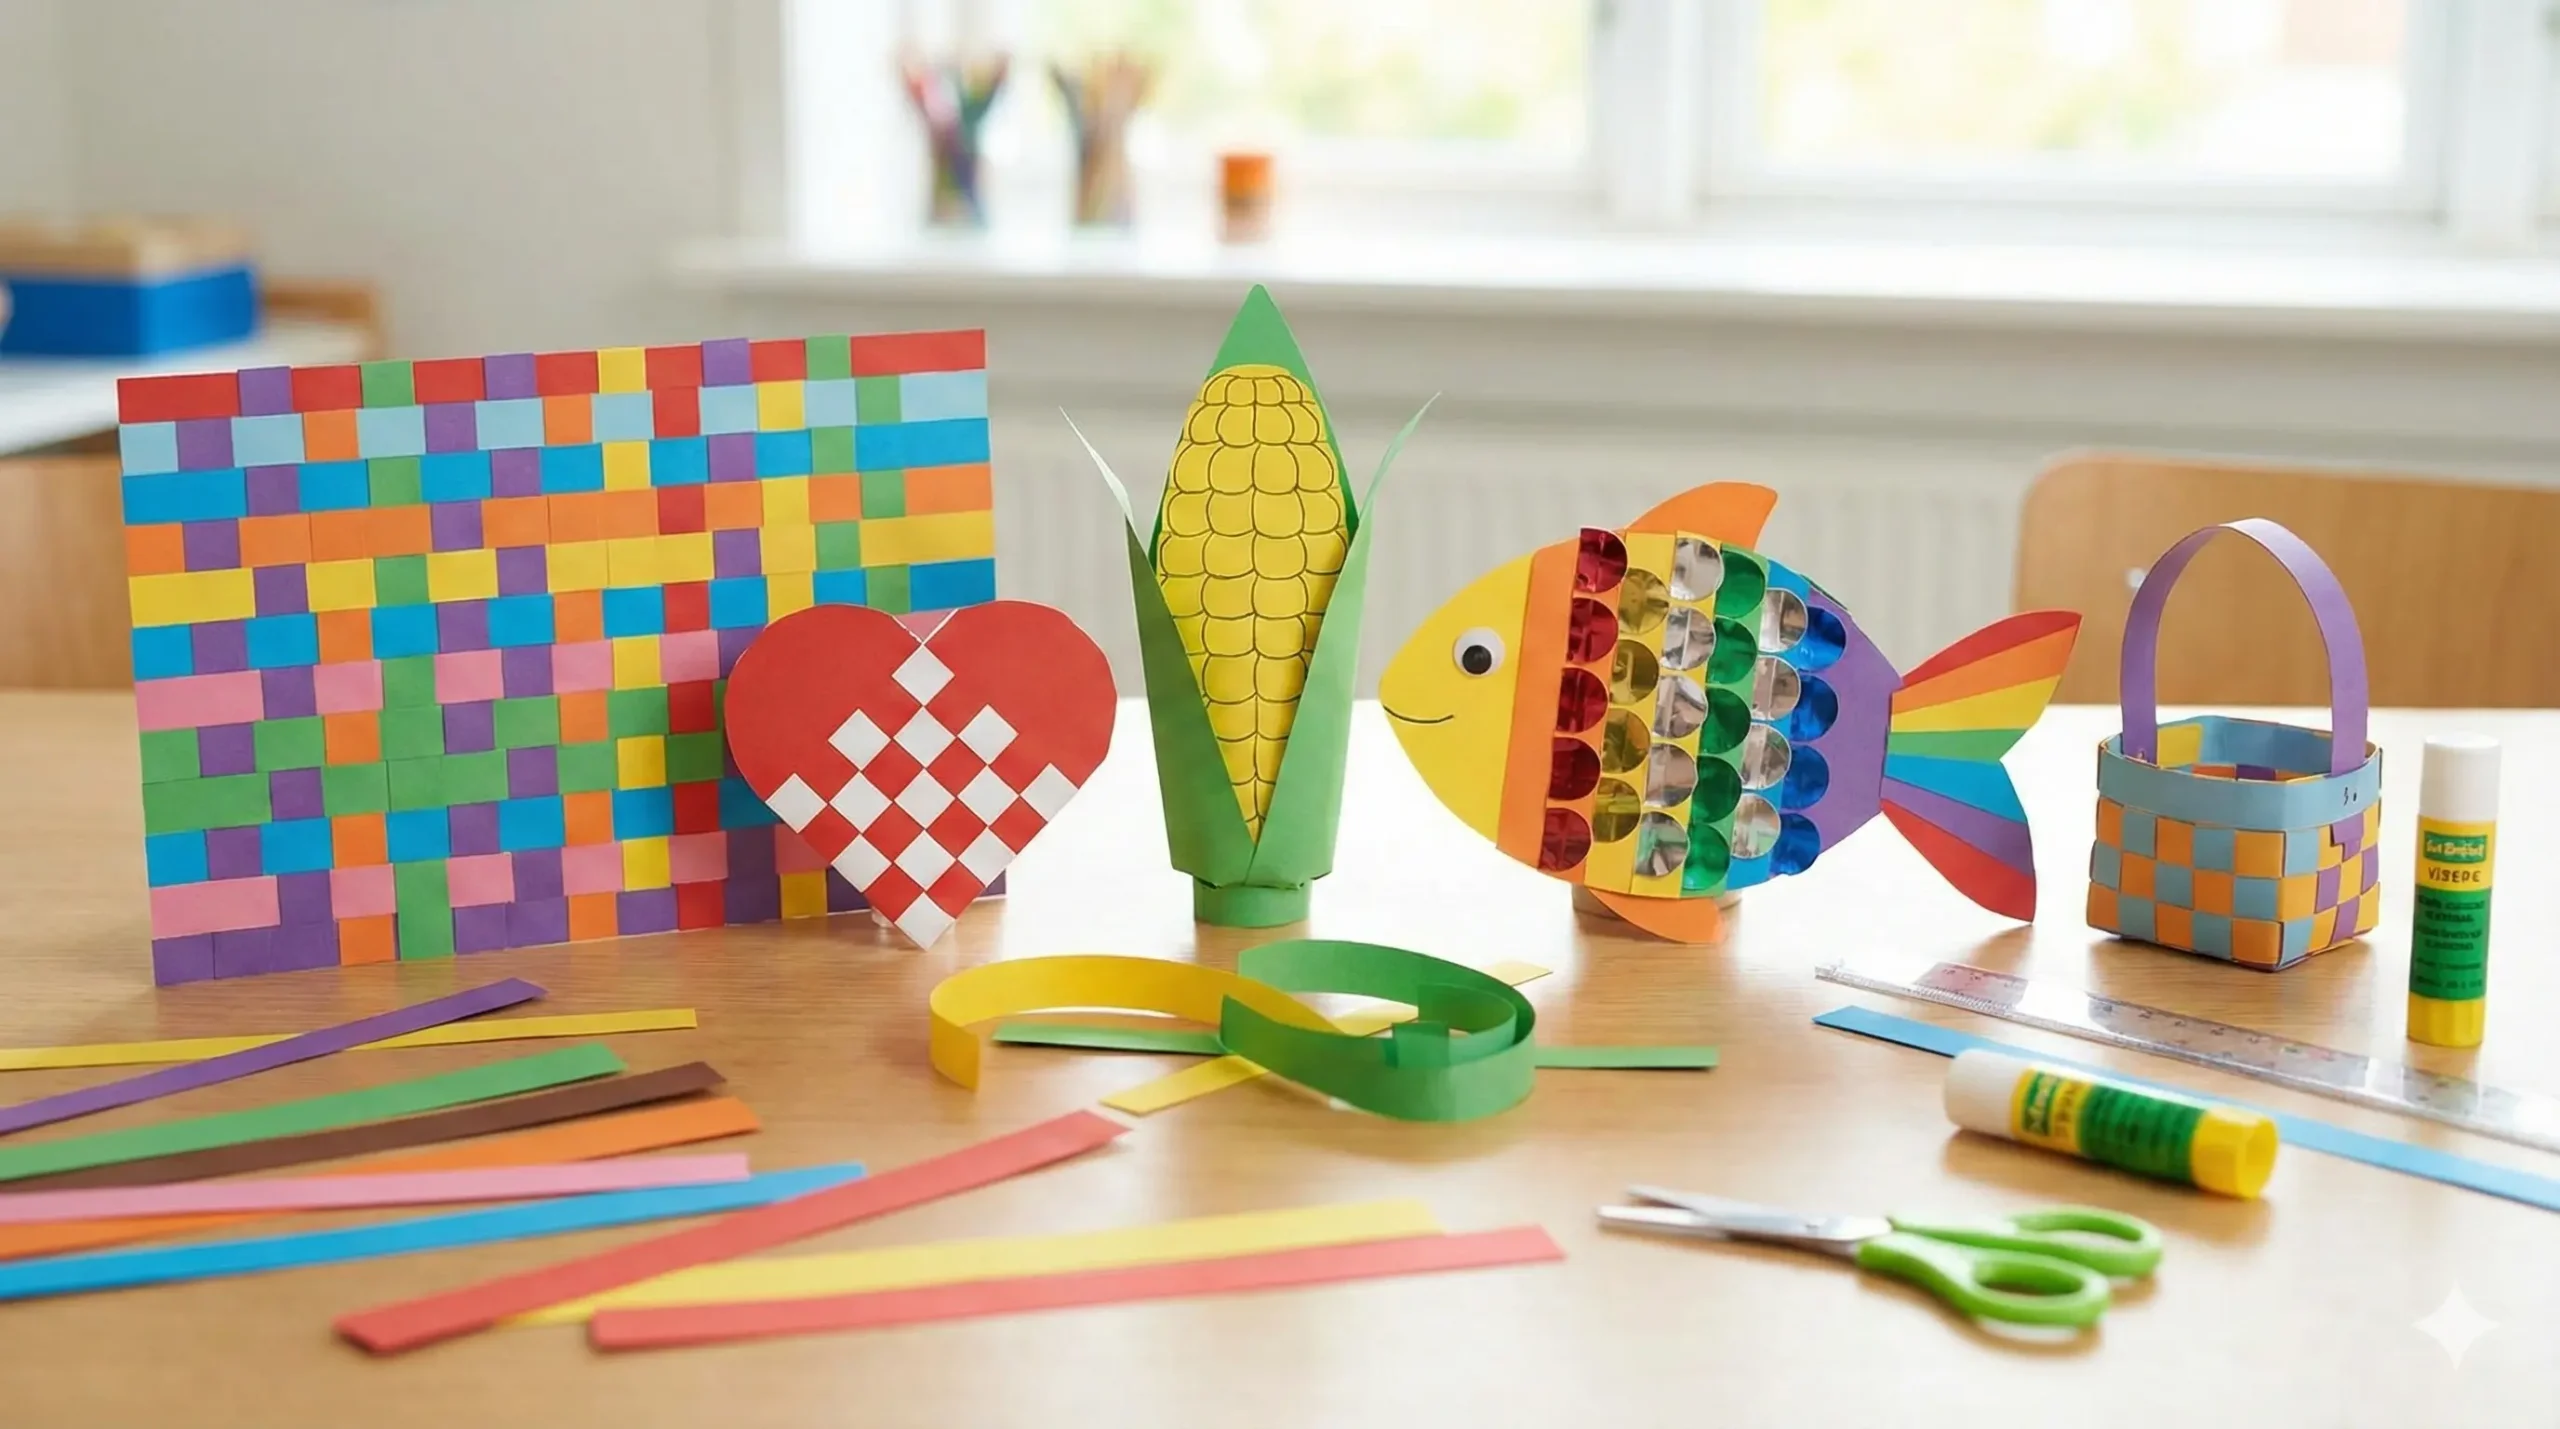
1. The Classic Checkerboard Placemat
The perfect starting point for preschoolers. How to make it: Fold a large sheet of construction paper in half. Cut slits from the fold line toward the open edge, stopping about an inch before the end. Unfold the paper. Cut strips of a contrasting color. Weave the strips Over-Under-Over-Under. Glue the ends. Laminate it to use it as a real placemat at dinner!
2. Fall Harvest Corn
Celebrate the changing seasons with this autumn favorite. How to make it: Cut a corn cob shape out of yellow cardstock. Cut vertical slits through the “kernels” area. Use strips of orange, light yellow, and white paper to weave through the cob. Once woven, glue green paper leaves (husks) to the bottom. This adds a lovely texture that mimics real corn kernels.
3. The “Rainbow Fish” Weave
Inspired by the beloved children’s book. How to make it: Draw a simple fish outline. Cut vertical slits across the body of the fish (avoiding the head and tail). Have the children weave brightly colored strips, or even shiny foil paper, through the body. The weaving creates the “scales” of the fish. Add a googly eye to finish!
4. Danish Woven Hearts (Julehjerter)
A traditional Scandinavian craft often used as Christmas ornaments. How to make it: This requires two pieces of paper (usually Red and White) folded in half. You cut slits into the folded edge of both pieces. Unlike normal weaving where you lay strips over each other, here you weave the loops through each other. When opened, it forms a heart with a checkerboard pattern. It can form a basket to hold candies on a tree.
5. Seahorse “Bony Plate” Weave
Did you know seahorses have bony plates arranged in rings? How to make it: Cut a seahorse silhouette. The belly of the seahorse is the perfect place to cut horizontal curved slits. Weave vertical strips of bright colors through the belly. This mimics the segmented, armored look of a real seahorse while allowing kids to play with tropical colors.
6. Woven Christmas Stocking
A festive decoration for the holiday season. How to make it: Cut two identical stocking shapes. On the top layer, cut horizontal slits. Weave green and gold paper strips into a red stocking. Once the weaving is done, glue the second stocking shape to the back to hide the messy edges and make the stocking sturdy. Punch holes around the edge and “sew” them together with yarn for extra fine motor practice.
7. Mondrian-Inspired Geometric Art
Introduce art history through weaving. How to make it: Piet Mondrian was famous for his grids of primary colors. Use a white paper base with black strips for the “warp” (the vertical lines). Then, weave in strips of red, blue, and yellow of varying widths. The result is a modern art masterpiece that looks great framed on a classroom wall.
8. The Woven Turtle Shell
Nature and biology meet art. How to make it: Cut a large oval for a turtle shell. Cut slits across the oval. Weave brown and green strips through it to create the “scutes” of the shell. Cut out a separate head, four legs, and a tail, and glue them to the underside of the woven shell. This creates a slightly 3D effect as the weaving adds bulk to the shell.
9. Paper Plate “Sun” Weaving
A variation that moves away from square paper. How to make it: Take a paper plate and cut an odd number of notches around the rim. Wrap yarn or thin paper strips across the plate to create “spokes” like a wheel. Then, starting from the center, weave colored paper or yarn over and under the spokes in a spiral. It looks like a radiant sun or a blooming flower.
10. Recycled Magazine Bookmarks
A functional eco-friendly craft. How to make it: Cut glossy magazine pages into thin strips. Weave them tightly into a long, thin rectangle. Because magazine paper is thin, you will need to weave tightly. Once finished, cover both sides with clear packing tape or contact paper. Punch a hole at the top and add a ribbon tassel. These are durable and waterproof!
11. 3D Paper Lanterns
Inspired by Chinese festivals. How to make it: Start with a standard rectangular weave (like the placemat). Once the weaving is secure, roll the rectangle into a cylinder and staple the edges. Attach a paper handle to the top. The woven texture allows light to filter through beautifully if you place a battery-operated tea light inside.
12. “Pixel Art” Characters
For the older kids who love video games. How to make it: Use a tight weave with thin strips (like graph paper). By carefully choosing which color strip goes over or under, or by using strips that have different colors colored onto them beforehand, kids can create “8-bit” images like a smiley face or a heart within the weave. This requires planning and advanced pattern skills.
13. Woven Hot Air Balloon
A whimsical project that explores color gradients. How to make it: The balloon shape is ideal for weaving. Cut the balloon shape and add vertical slits. Encourage kids to weave using a gradient of colors (e.g., dark blue, medium blue, light blue) to mimic the sky or a rainbow. Glue a small brown square at the bottom for the basket.
14. The Chevron Weave (Advanced)
Taking the pattern to the next level. How to make it: Instead of straight vertical and horizontal lines, cut the “warp” slits in zigzag lines. When you weave straight strips through zigzag slits, it creates a dazzling optical illusion and a chevron arrow pattern. This is great for older children (ages 8+) who want a challenge.
15. Woven Paper Basket
Moving from 2D to 3D. How to make it: This uses a “tic-tac-toe” board layout. Lay out three long strips vertically and three horizontally, woven in the center. Fold up the loose ends to form the “walls” of the basket. Weave a new, long strip continuously around the walls to build the basket up. Secure with glue at the top rim.
Tips for Success with Kids
If you are doing these activities with a group, here are three “teacher tips” to keep the frustration levels low and the fun levels high:
- The “Stop Line”: When kids cut the slits for the loom, they often accidentally cut the paper in half. Draw a bold line about an inch from the edge and tell them, “Stop your scissors at the stop line!”
- Tape is Your Friend: For younger children, tape the “loom” (the main paper) to the desk so it doesn’t slide around while they are trying to manipulate the strips.
- Variety of Textures: Don’t stop at construction paper. Try weaving with ribbon, strips of fabric, aluminum foil, or even dried grass for nature crafts.
Final Thoughts
Paper weaving is a testament to the idea that you don’t need expensive gadgets or messy supplies to create something beautiful. It connects us to a history of craftsmanship that spans the globe—from the baskets of Africa to the paper screens of Japan.