There is a certain kind of magic held within a printed photograph. In a world where we scroll through thousands of images on our phones every day, holding a physical picture creates a tangible connection to a moment in time. It might be a blurry selfie with a best friend, a snapshot from a summer vacation, or a family portrait that freezes time for just a second.
If the word ‘photography’ itself means ‘to draw with light’ (derived from the Greek words phos and graphé), then a photo frame is the gallery wall for your personal masterpieces.
Before we dive into the glue and glitter, it is worth sharing a little history with your kids. Did you know that when the French inventor Joseph Nicéphore Niépce took the world’s first photograph in 1826, it wasn’t a quick “click”? He had to leave his camera’s shutter open for eight whole hours just to capture a single grainy view from his window! Thankfully, today we can capture memories in milliseconds.
Celebrating these memories shouldn’t be expensive. In fact, making your own frames is a fantastic way to personalize your room decor. Whether you are a parent looking for a rainy-day activity or a teen wanting to spruce up your locker, here are 15 creative DIY photo frame ideas that range from cute and simple to trendy and chic.
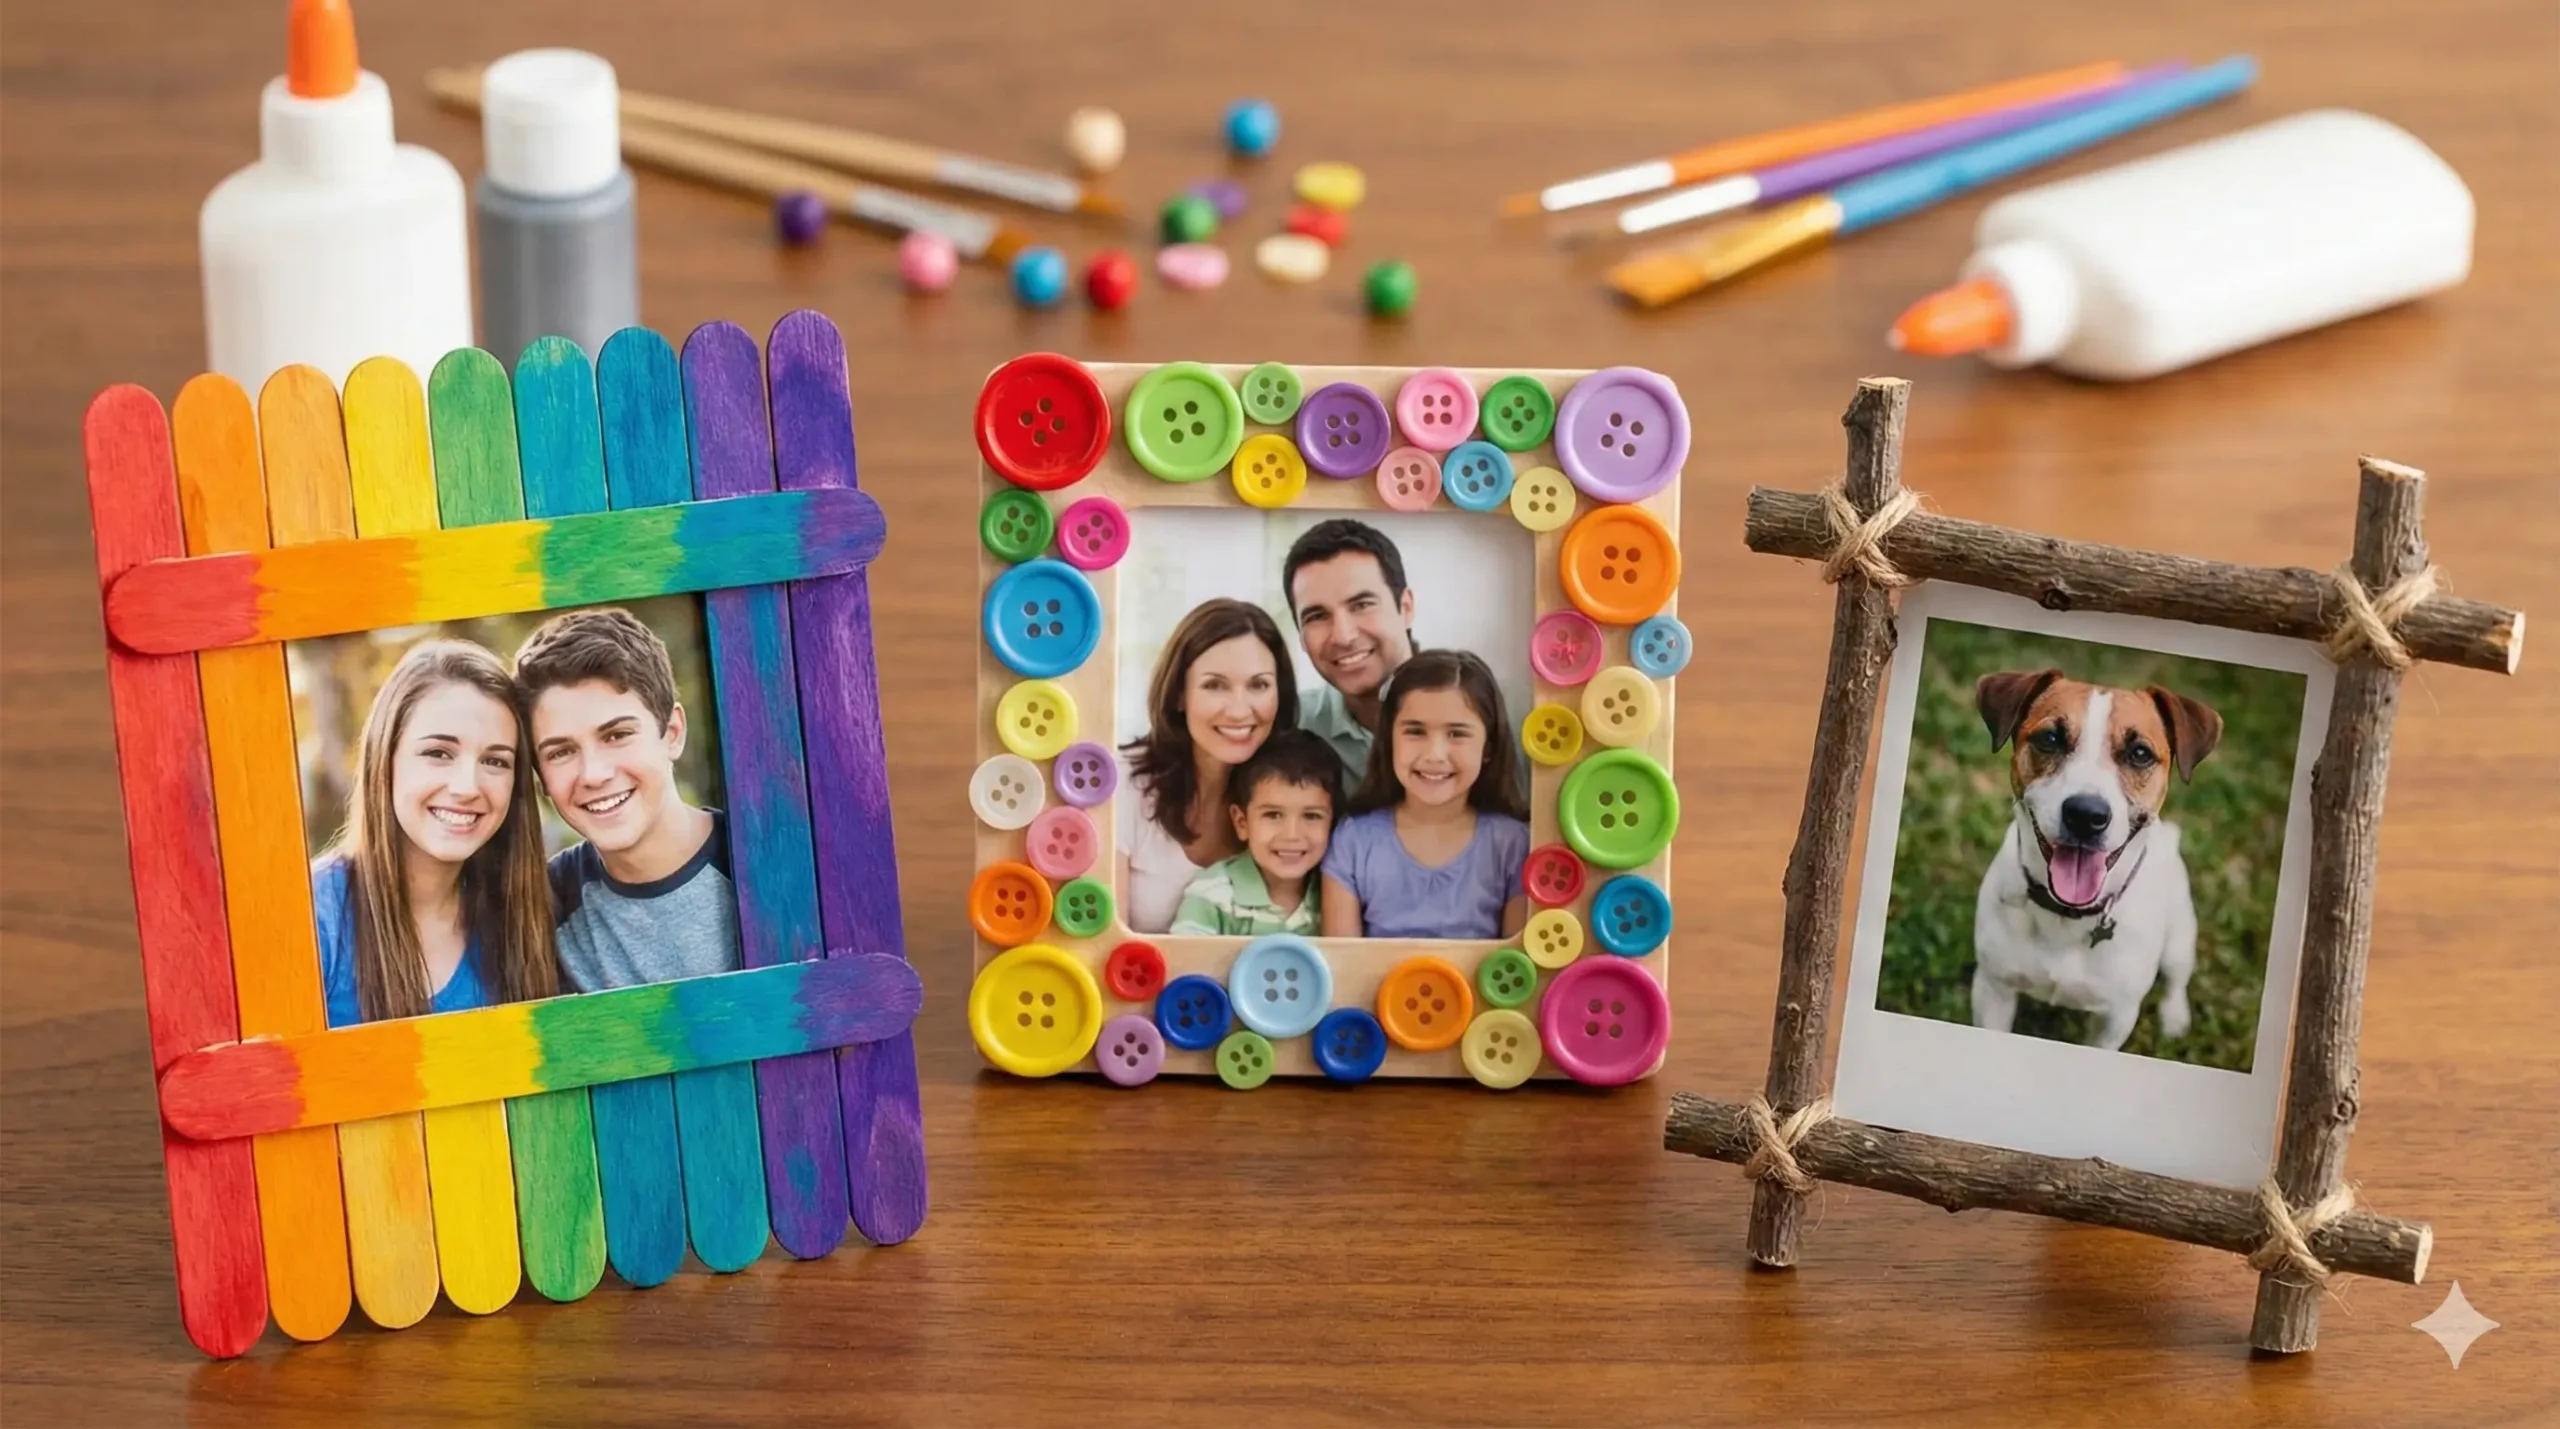
1. The Classic Popsicle Stick Palette
Let’s start with a craft staple. The humble popsicle stick is perfect for younger children because it is easy to handle and virtually mistake-proof.
- The Twist: Don’t just glue them in a square. creative patterns! You can layer them to create a deep shadow-box effect or line them up side-by-side to create a solid “canvas” backboard for your photo.
- Decoration: Use washi tape for clean geometric lines, or let the kids go wild with acrylic paints. For a farmhouse look, stain the sticks with watered-down brown paint before gluing.
2. The Upcycled Puzzle Piece Frame
We all have that one jigsaw puzzle that is missing three pieces. Instead of throwing it away, turn it into art.
- How to do it: Glue the puzzle pieces around a simple cardboard frame base. You can overlap them to create texture.
- The Look: For a modern look, spray paint the entire finished frame in a single matte color—white, gold, or black. The texture of the puzzle pieces remains, but the uniform color makes it look like expensive textured decor.
3. The “Action Figure” Golden Frame
This is a huge hit with pre-teens and fans of superheroes or dinosaurs.
- The Concept: Take small plastic toys (old army men, dinosaurs, or fast-food meal toys) and glue them densely around a cheap dollar-store frame.
- The Finish: Once the glue is dry, take the frame outside and spray paint the entire thing (toys and all) in metallic gold or silver. The result is an edgy, high-end looking sculpture frame that looks amazing on a bookshelf.
4. Nature’s Twig & Jute Frame
Perfect for autumn or a rustic-themed bedroom. This craft starts with a nature walk to collect materials.
- Method: Cut a frame out of sturdy cardboard. Gather twigs of similar thickness and trim them to size. Glue the twigs horizontally or vertically along the cardboard.
- Finishing Touch: Wrap the corners with jute twine or burlap ribbon to hide any uneven stick ends. It’s a cozy home for outdoor adventure photos.
5. The Rock & Pebble Mosaic
If you have a collection of smooth stones from a beach trip, this is the best way to display them.
- Tip: Use a strong adhesive like tacky glue or a low-temp glue gun (with supervision).
- Design: Sort your rocks by color. You can create an ombre effect, fading from dark grey stones at the bottom to white pebbles at the top. This heavy, sturdy frame feels substantial and makes a great gift for Father’s Day.
6. Yarn-Wrapped Cardboard Frames
This is arguably the most relaxing craft on this list, making it great for teens who need to de-stress.
- The Technique: Cut a frame shape from a cereal box. Tie a piece of colorful yarn to the frame and start wrapping. The goal is to cover every inch of cardboard.
- Advanced Level: Use variegated yarn (yarn that changes color) for an automatic pattern, or switch colors halfway through to create color-blocked stripes. It brings a soft, warm texture to a room.
7. The Washi Tape Geometric Frame
Washi tape (Japanese decorative masking tape) is a teen favorite because it comes in infinite patterns and creates zero mess.
- The Hack: Buy a plain, flat wooden frame from a craft store. Apply strips of washi tape.
- Design: You can place them randomly for a “confetti” look, or carefully align patterns. Since the tape is removable, you can change the design whenever you change your room’s color scheme.
8. DIY “Polaroid” String Lights
This isn’t a single frame, but a framing system that is incredibly popular in dorm rooms and teen bedrooms.
- Setup: String a set of fairy lights (battery operated is best) in a zigzag pattern on the wall using clear command hooks.
- The Frames: Use mini wooden clothespins to clip your photos directly onto the wire. You can paint the clothespins with glitter or metallic markers to add a bit of sparkle. It turns your entire wall into a glowing gallery.
9. The Recycled Magazine Reed Frame
This is an eco-friendly project that looks surprisingly sophisticated.
- The Process: Tear pages out of old colorful magazines. Roll each page tightly from the corner to create a thin tube (or “reed”) and secure it with a dab of glue.
- Assembly: Glue these reeds side-by-side onto a frame base. You can trim them to be uniform or leave them at different lengths for a funky, sunburst effect. The mix of colors from the magazine pages creates a vibrant mosaic.
10. The Button Stash Frame
Every household has a jar of random buttons. It is time to use them.
- Style: For a chaotic, fun look, glue buttons of all sizes and colors randomly, overlapping them to cover the frame.
- Chic Option: For a more refined look, use only buttons of one color (like all white pearlescent buttons) or layer vintage brass buttons for a steampunk vibe.
11. The Lego Brick Frame
For the builders in the family, this frame is practically a toy itself.
- The Build: You can build a frame entirely out of Lego bricks, or simply glue flat Lego plates onto an existing frame.
- Why it’s cool: You can modify it later! Add little Lego minifigures standing on top of the frame, or build little towers coming off the sides. It makes the photo interactive.
12. The Glitter Shaker Frame
This mimics those fun snow globes and is perfect for shaker-style crafts.
- How it works: You need two pieces of clear plastic (acetate sheets work well). Glue three sides together to form a pocket. Fill it with chunky glitter or sequins, then seal the fourth side.
- Display: Tape your photo behind this glitter packet. When you pick up the photo, the glitter moves around like magic. (Tip: Be sure to seal the edges very well with clear tape or strong glue so you don’t have a glitter explosion!)
13. The Clipboard Photo Wall
A very trendy industrial-chic idea for teens who want to swap photos often without damaging them.
- The Base: Take 3 or 4 plain wooden clipboards.
- Decor: Paint the board part in chalkboard paint or geometric designs, but leave the metal clip as is.
- Usage: Hang the clipboards in a grid on the wall. Simply clip your photo in. This is perfect for teens who want to display test schedules, inspirational quotes, or photos that change weekly.
14. Old CD Mosaic Frame
Do you have a stack of scratched DVDs or CDs? Their shiny surface is perfect for a disco-ball effect.
- Safety First: (Adult step) Cut the CDs into irregular shards using strong scissors. The plastic can be sharp, so wear safety glasses.
- Assembly: Glue the shiny shards onto a wide frame surface like a mosaic. When the sunlight hits this frame, it throws rainbows across the room. It’s the ultimate 90s throwback aesthetic.
15. The “Floating” Flower Frame
This is a delicate, beautiful idea that looks professional.
- Materials: You need a frame that has glass on both the front and back (or two pieces of glass/acrylic).
- The Art: Press some wildflowers or leaves until they are flat and dry. Arrange your photo in the center of the glass, and surround it with the pressed flowers.
- The Seal: Sandwich everything between the two glass panes. The transparent background makes the photo and flowers look like they are floating in mid-air.
Why DIY Frames Matter
In an age of digital clouds and infinite storage, we often forget to look at our photos. We take them, post them, and forget them. Taking the time to build a frame changes that relationship.
When a child spends an hour painting a frame for a picture of their grandparents, they are reflecting on that relationship the entire time they are crafting. When a teen curates a clipboard wall, they are defining their identity and what matters to them in that space.
Tips for Success:
- Prep the surface: If you are gluing things onto a glossy plastic frame, sand it lightly first so the glue sticks better.
- Print quality: You don’t need a fancy printer. Standard home printers work fine, or you can print “wallet size” photos to fit smaller DIY frames.
- Let it dry: The hardest part for kids is waiting. Make sure the frame is completely dry before trying to insert the photo, or you might glue the picture to the frame permanently!