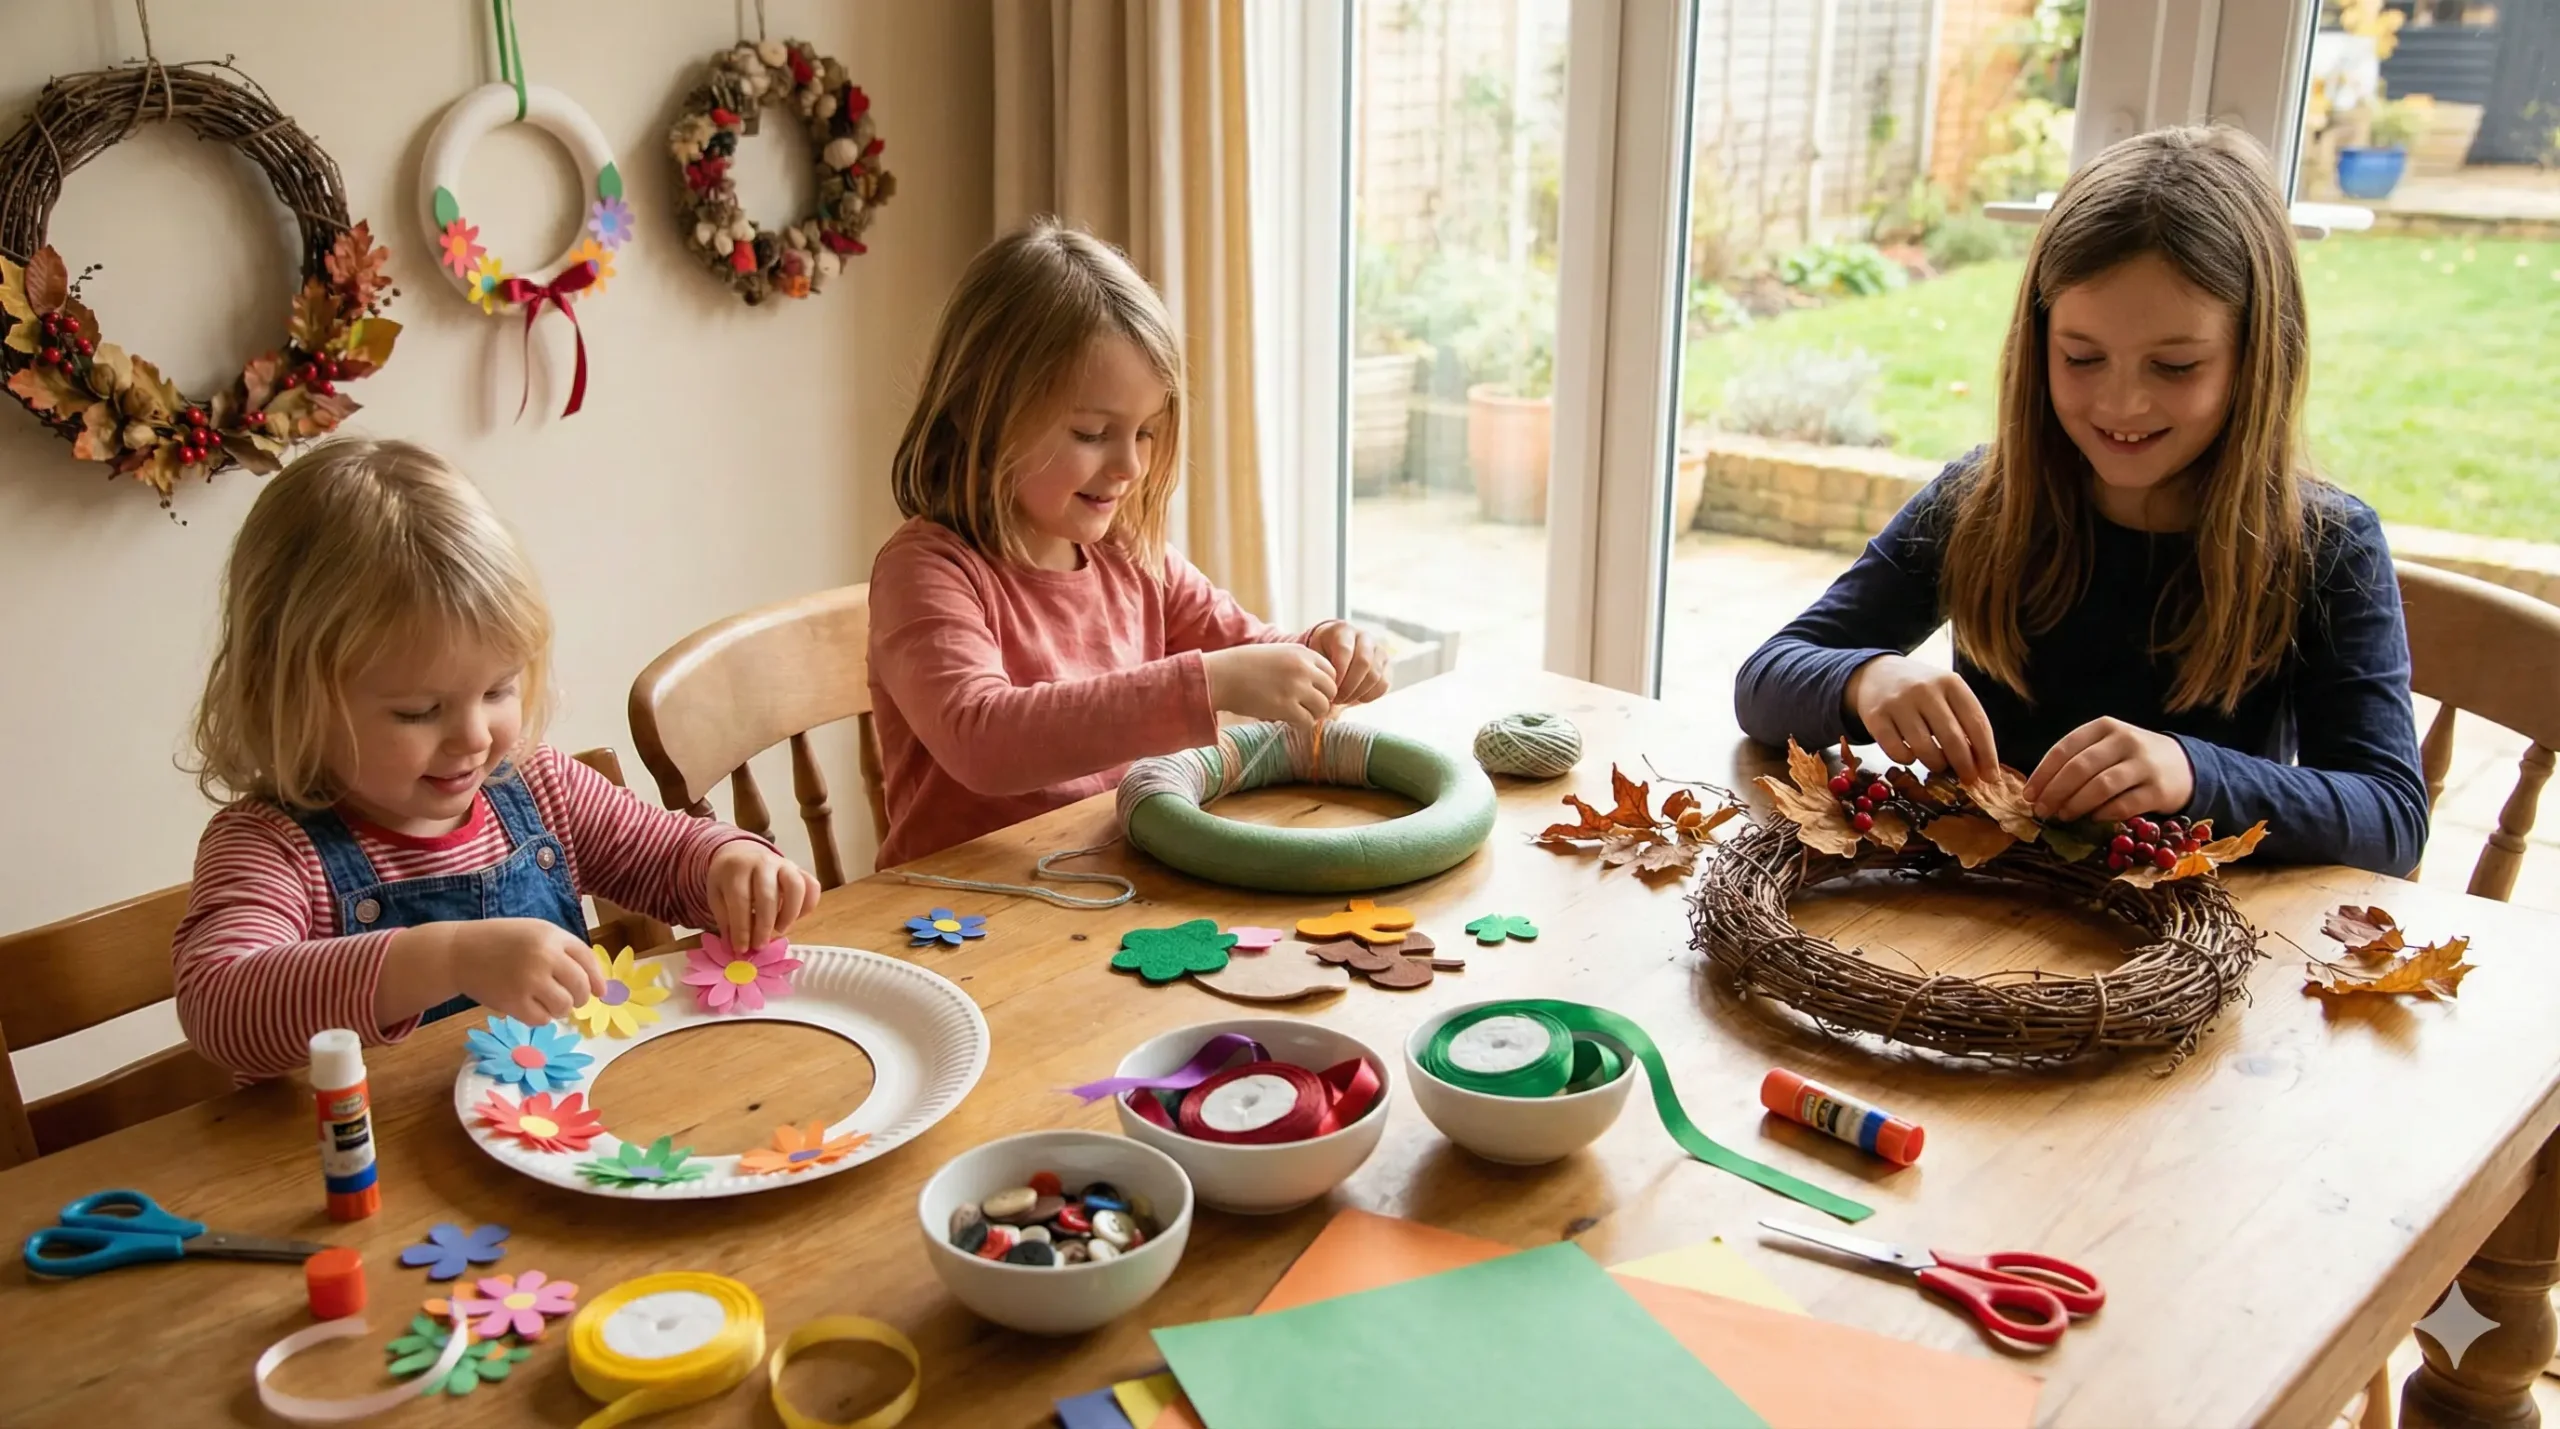
If there is one quick way to refresh a child’s room or the front door without spending a fortune, it is a wreath. But I am not talking about the expensive, store-bought ones that collect dust. I am talking about the messy, creative, and incredibly fun DIY wreath crafts that kids can make themselves.
There is something special about seeing your child’s personality reflected in a piece of decor. Whether it is a spooky paper plate ghost for Halloween or a vibrant tissue paper flower ring for spring, these projects do more than just decorate a wall—they build confidence and fine motor skills.
In this guide, we are going to explore 20 beautiful and distinct DIY wreath ideas suitable for kids of all ages. We will cover every season, use accessible materials, and ensure these crafts are actually doable.
Why Wreath Making is the Perfect Kids’ Activity
Before we dive into the tutorials, let’s talk about why this specific craft is a goldmine for parents and teachers.
- Fine Motor Development: threading beads, crunching tissue paper, and gluing small items all strengthen those little hand muscles.
- Seasonal Learning: It’s a natural conversation starter about changing seasons, holidays, and cultural traditions.
- Low Cost, High Reward: Most of these uses bases you already have—cardboard boxes, paper plates, or wire hangers.
Essential Materials for Your Wreath Station
You do not need a professional craft room. However, having a “Wreath Kit” ready can save you a scramble. Here is what I recommend keeping on hand:
- Bases: Paper plates (the cheap, flimsy ones are actually better for cutting), cereal box cardboard, wire coat hangers, and pool noodles.
- Adhesives: Glue sticks for paper, tacky glue for heavier items, and a low-temp glue gun (for adult supervision).
- Decor: Tissue paper squares, pom-poms, pipe cleaners, buttons, and nature finds like pinecones or dried leaves.
Spring & Nature-Inspired Wreaths
Bringing the outdoors in.
1. The Classic Paper Plate Floral Wreath
This is the best starting point for toddlers. Cut the center out of a paper plate to create a ring. Have the kids cut flower shapes out of colored construction paper (or use pre-cut foam stickers). Glue them in layers around the ring. Pro-tip: Add a ribbon loop at the top before gluing the flowers so the mechanism is hidden.
2. Egg Carton Flower Wreath
Don’t throw away your egg cartons! Cut the individual cups out and trim the edges to look like petals. Paint them in bright pastels—pinks, yellows, and blues. Once dry, glue them onto a cardboard circle. This creates a stunning 3D effect that looks far more expensive than it is.
3. Rolled Paper Rose Wreath
For older kids who can handle scissors well, this is a winner. Cut spirals out of colored paper and roll them up from the outside in to create little roses. Glue the base of the rose to secure it. Cover a styrofoam or cardboard wreath form completely with these paper blooms. It takes time, but the result is a showstopper.
4. The “Nature Walk” Sticky Wreath
This requires zero glue! Cut a ring of cardboard and cover it with double-sided tape. Take the kids on a nature walk and let them stick their finds directly onto the wreath—small leaves, dandelion heads, and flat pebbles. It is ephemeral art at its best.
5. Coffee Filter Butterfly Wreath
Take standard white coffee filters and let kids color on them with washable markers. Spray them lightly with water to watch the colors bleed and blend like tie-dye. Once dry, pinch them in the middle with a pipe cleaner to make butterflies and attach them to a wire frame.
Summer Fun & Sunshine Wreaths
Bright colors and beach vibes.
6. The Cocktail Umbrella Wreath
Nothing screams “Summer” like those little paper umbrellas used in drinks. Buy a bulk pack from a dollar store. Push the stems into a foam wreath base until the entire surface is covered in colorful, open umbrellas. It is textured, vibrant, and incredibly easy.
7. Seashell & Sand Wreath
If you have a collection of shells from a beach trip, this is how you use them. Paint a cardboard base with a layer of glue and sprinkle sand over it for texture. Then, use tacky glue to attach shells, sea glass, and maybe a starfish. It’s a great sensory project.
8. Sunshine Clothespin Wreath
Paint wooden clothespins yellow and orange. Clip them around the edge of a yellow paper plate or cardboard circle. It looks exactly like a sun! You can even draw a happy face in the center. This is excellent for strengthening the pincer grasp in younger children.
9. Flip Flop Welcome Wreath
This is a fun one for pre-teens. Buy inexpensive flip-flops (children’s sizes work best for a smaller wreath). Arrange them in a circle, heel-to-toe, and glue them together or wire them to a frame. Add a “Welcome” sign in the center. It’s quirky and perfect for a pool house or summer bedroom.
10. Tissue Paper “Scrunch” Wreath
Cut tissue paper into 3-inch squares. Have the child place a pencil eraser in the center of a square, twist the paper around the pencil, dip it in glue, and push it onto a paper plate rim. Repeat until the whole thing is fluffy. Use bright tropical colors like hot pink, lime green, and teal.
Autumn & Harvest Wreaths
Warm tones and cozy textures.
11. Handprint “Fall Leaf” Wreath
Trace your child’s hand on red, orange, yellow, and brown paper multiple times. Cut them out and glue them onto a ring, layering them so the fingers point outward like jagged leaves. This is a wonderful keepsake that captures the size of their hand for that year.
12. Real Leaf Preserved Wreath
Collect fallen leaves that are still slightly pliable. Dip them in melted beeswax (adult supervision required) or coat them with Mod Podge to preserve them. Layer them onto a grapevine wreath base. The preservation step keeps them from crumbling after a week.
13. Popcorn & Cranberry Wreath
A twist on the garland! Glue air-popped popcorn and dried cranberries onto a cardboard ring. It creates a beautiful rustic look. Just be sure to seal it with a clear spray sealant if you want to keep critters away, or hang it outside as a bird feeder!
14. Scrappy Fabric Wreath
If you have old fall-colored shirts or fabric scraps, cut them into strips roughly 1 inch wide and 6 inches long. Let the kids tie them around a wire hanger bent into a circle. Keep tying until the wire is completely hidden. It’s cozy, soft, and requires no glue.
15. The “Thankful” Wreath
Create a simple paper leaf wreath, but before gluing the leaves down, have the child write something they are grateful for on each leaf. It makes for a beautiful centerpiece on a door during Thanksgiving dinner.
Winter & Holiday Wreaths
Festive cheer and sparkle.
16. Puzzle Piece Snowflake Wreath
We all have puzzles with missing pieces. Paint the back of old puzzle pieces white. Glue them onto a small cardboard ring, layering them haphazardly to create a “blizzard” effect. Sprinkle with silver glitter while the paint is wet. Add a blue ribbon for a “Frozen” inspired look.
17. Button Christmas Wreath
Gather green buttons of all different sizes. Glue them onto a heavy cardstock ring. You can stack smaller buttons on top of larger ones to add depth. Add a few red buttons as “holly berries.” This looks sophisticated enough to give as a gift to grandparents.
18. Paper Plate Santa Wreath
Cut the center out of a paper plate. Glue cotton balls all around the bottom half for the beard. Color the top half red or add a red paper hat. It’s a classic, jolly craft that toddlers absolutely love because of the soft texture of the cotton balls.
19. Wrapped Yarn Wreath
Take a foam wreath form and a skein of chunky white or red yarn. Secure one end and let the child wrap the yarn around and around the wreath until the foam is hidden. It takes patience but is very rhythmic and calming. Add felt felt holly leaves to finish.
20. The “New Year” Tinsel Wreath
Use a shiny tinsel garland (gold or silver). Wrap it around a wire form. Then, attach pipe cleaners bent into numbers to show the coming year (e.g., “2026”). It is the perfect craft to keep them busy while waiting for the ball to drop.
Expert Tips for Success
As someone who has cleaned up plenty of glitter spills, here are my non-negotiable rules for wreath making:
- Prep the Mechanism First: Always attach your hanging string or hook before you start decorating. It is a nightmare to try and glue a string onto a finished, fragile wreath.
- Volume over Perfection: Wreaths look best when they are full. Encourage kids to overlap their materials (leaves, flowers, buttons). Gaps can make the wreath look flimsy.
- Let it Dry Flat: Gravity is the enemy of wet glue. Leave the wreaths lying flat on a table overnight before trying to hang them up.
Final Thoughts
Making a DIY wreath is more than just a way to kill an hour on a rainy afternoon. It is a way to teach children that they have the power to change their environment. They learn that with a little cardboard and some glue, they can make a space feel happier, spookier, or more festive.
So, grab that stack of old paper plates, raid the recycling bin, and get started. Your front door is waiting for its next masterpiece.
Frequently Asked Questions (FAQs)
Q: What is the best glue for kids to use on wreaths? A: For paper-based wreaths, a standard glue stick is fine. For heavier items like buttons, acorns, or pasta, use “Tacky Glue” (PVA glue). It is thicker than school glue and holds better without needing a hot glue gun.
Q: How do I hang a paper plate wreath without damaging the door? A: Command hooks or removable adhesive putty are your best friends here. Since paper wreaths are lightweight, you don’t need heavy-duty nails. A small loop of masking tape on the back often works for bedroom doors.