The forests are calling! With the International Day of Forests arriving on March 21st, there is no better time to celebrate the “lungs of our Earth.”
I often feel that with every passing generation, children lose touch with nature more and more. While kids of my grandparents’ generation spent nearly all day outdoors, climbing trees and scraping knees, kids of today often spend just a couple of hours outside—if that.
Maintaining a relationship with nature is essential for children. It gives them an idea of the wonders of the natural world, of which they are also a part. It teaches them the art of co-existing peacefully, showing how each creature has its own place and how every plant or animal blooms in its own time.
Beyond these lessons, the natural world shows us how dependent we are on it for things we take for granted. From the paper we write on to the medicines we take, forests play a massive role. Let’s embark on a virtual forest adventure with 10 fascinating forest crafts for kids that act as perfect educational tools.
Why Do We Celebrate Forests? (Fun Facts for Kids)
Before we dive into the glue and scissors, it is important to understand why we are making these crafts. Using art is a fantastic way to teach environmental science. Here are some mind-blowing facts you can share with your children or students while you craft:
- The World’s Lungs: Forests are often called the lungs of the Earth because they take in carbon dioxide and breathe out the oxygen we need to survive.
- Medicine Chests: Did you know that more than 25% of the medicines we use today originated from rainforest plants?
- Home Sweet Home: Forests are the most biologically diverse ecosystems on land, home to more than 80% of the terrestrial species of animals, plants, and insects.
- Water Guardians: Forests act like giant sponges! They catch rainwater and release it slowly, which prevents floods and keeps our rivers clean.
- A Busy Place: Over 300 million people live in forests worldwide, and their lives depend entirely on the health of these trees.
Now that we know how vital these ecosystems are, let’s honor them with creativity!
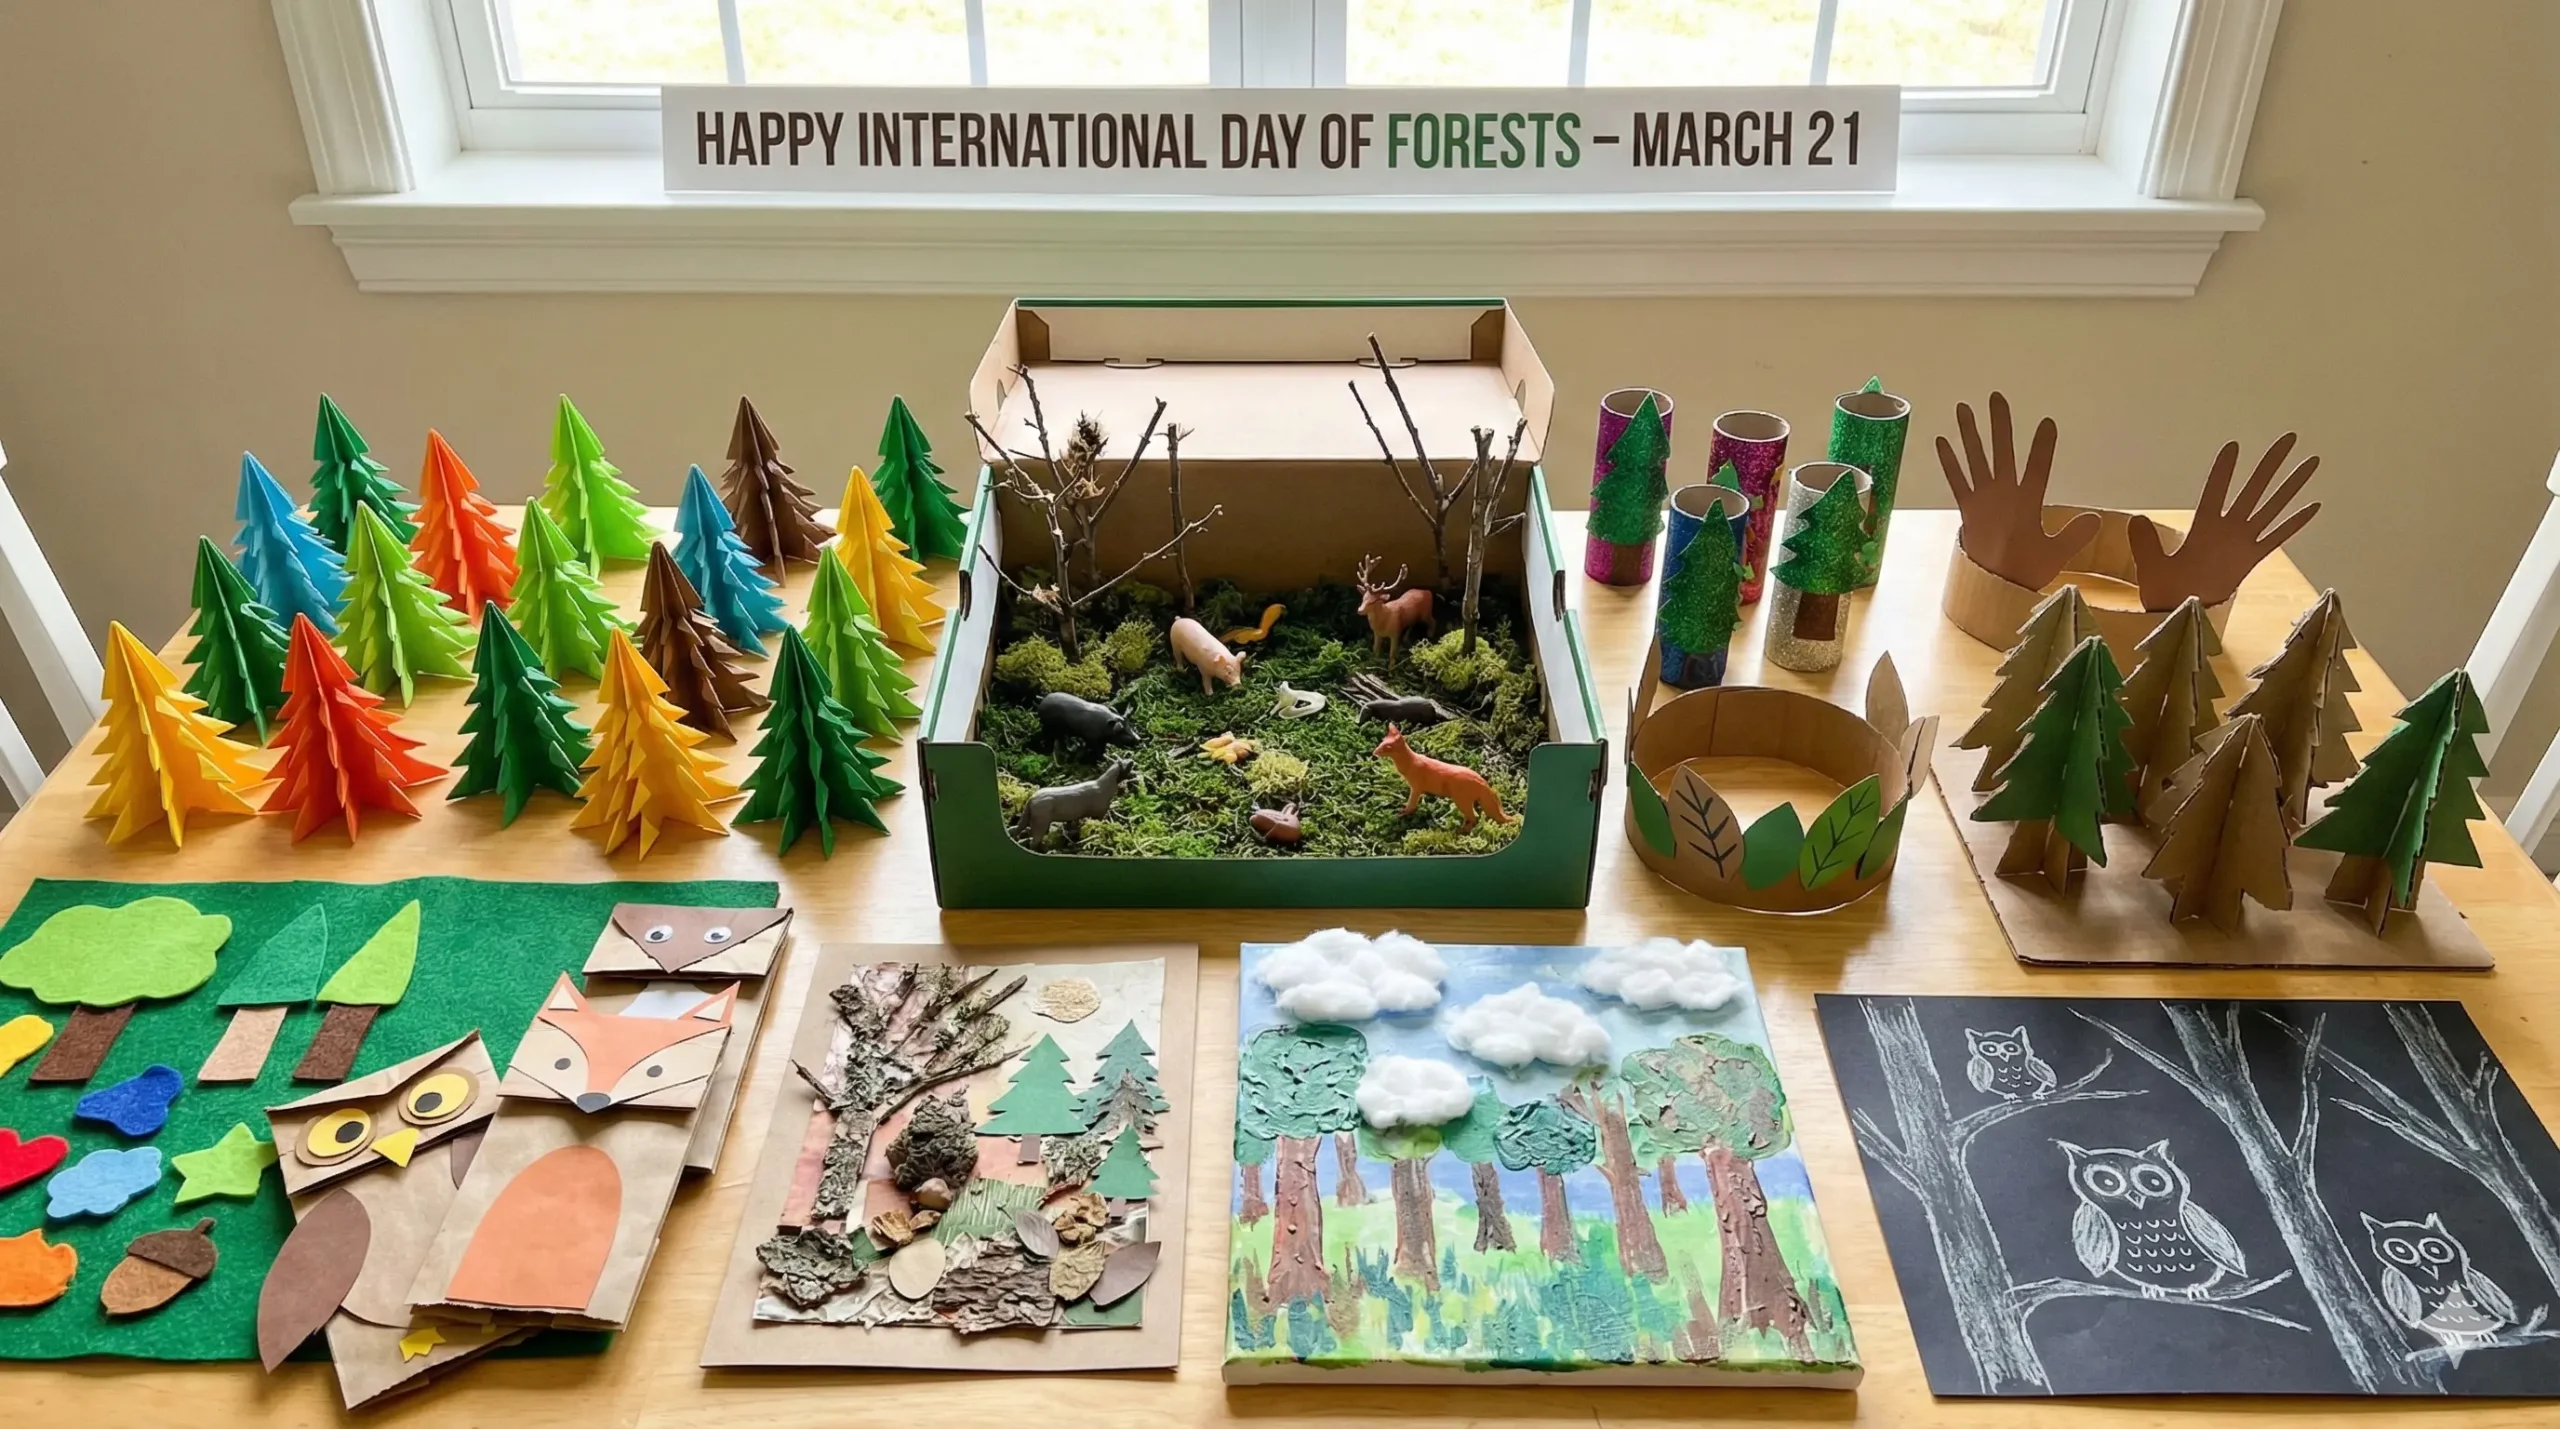
1. 3D Folded Paper Forest
What is the main thing in a forest? The trees, of course! This craft celebrates the diversity of trees using simple paper folding techniques.
- What You Need: Green construction paper (various shades), brown cardstock, scissors, glue.
- How to Make It:
- Cut the green paper into different shapes: triangles for pines, circles for oaks, and ovals for other broadleaf trees.
- Fold each shape in half vertically.
- Take two identical shapes (e.g., two green triangles), fold them, and glue one half of the first triangle to one half of the second triangle. This creates a 3D tree that can stand up.
- Cut small rectangular strips of brown cardstock for trunks. Slit the bottom of your 3D foliage and slide the trunk in.
- Arrange them on a table to create a dense, colorful paper forest!
2. Shoebox Forest Diorama
We thoroughly enjoyed making this 3D forest diorama, complete with vegetation and animals. It is a classic school project for a reason!
- What You Need: An old shoebox, paints, pebbles, moss (real or fake), small plastic animal toys, twigs.
- How to Make It:
- Paint the inside of the shoebox: blue for the sky on the top and back, and green/brown for the ground on the bottom.
- Go on a nature walk to collect small twigs. These will be your trees. Use playdough or clay to anchor the twigs to the bottom of the box.
- Glue moss or crumpled green tissue paper onto the “branches” of your twig trees.
- Add a blue paper river running through the middle.
- Place your plastic animals in their habitat—maybe a monkey swinging from a string vine or a bear hiding in a cave made of rocks.
3. Simple Felt Forest (Sensory Play)
Here’s a simple, easy craft project for toddlers. This is an open-ended project with no right or wrong way to do things, perfect for developing fine motor skills.
- What You Need: A large sheet of brown felt (the ground), various shades of green felt, scissors.
- How to Make It:
- Pre-cut the green felt into triangles, circles, and cloud shapes.
- Cut smaller brown strips for trunks.
- Lay the large brown sheet on the floor or a table.
- Let your toddler arrange the “trees” however they like. Because felt sticks to felt naturally, the pieces will stay in place without glue, meaning they can build and rebuild their forest over and over again!
4. Paper Bag Woodland Puppets
If you’d like to have some fun with the animals in the forest, these puppets are a great way to put those lunch bags to good use.
- What You Need: Brown paper lunch bags, colored construction paper, markers, glue.
- How to Make It:
- The Owl: Cut two large circles for eyes and a triangle beak. Glue them to the flap of the bag (the bottom of the bag when folded flat). Cut feathers from paper and glue them to the body.
- The Fox: Paint the bag orange. Glue white triangles inside orange triangles for ears and stick them to the top corners. Add a white heart shape for the face and a black nose.
- Put your hand inside and put on a puppet show about forest conservation!
5. Textured Woodland Collage
How bright and colorful is a collage? This is a great project for primary school children who are learning about the layers of the forest (floor, understory, canopy).
- What You Need: Old magazines, tissue paper, sandpaper, cardstock, glue.
- How to Make It:
- Talk about textures. Forests aren’t flat!
- Use rough sandpaper to cut out tree trunks (representing bark).
- Crumple green tissue paper for the leaves (representing soft foliage).
- Cut animal pictures out of old magazines.
- Have the child layer these elements onto a background sheet. Encourage them to hide the animals behind the “trees” to mimic how animals camouflage in the wild.
6. Mixed Media Forest Scene
This project is a wonderful use of mixed materials to create a lifelike forest. It makes you want to take a trip to the hills, doesn’t it?
- What You Need: A canvas or sturdy cardboard, acrylic paints, real dried leaves, small twigs, cotton balls.
- How to Make It:
- Paint a sunset background on the canvas using warm colors (oranges, pinks, purples).
- Once dry, glue real twigs vertically to represent tree trunks.
- Instead of painting leaves, glue dried crushed leaves or small pieces of sponge dipped in green paint around the branches.
- Stretch out cotton balls thinly to create “mist” or clouds floating through your forest.
7. Magical Enchanted Forest
We have all read stories about enchanted forests and often wished we could visit one. While that may not be easy, you can create your own version!
- What You Need: Toilet paper rolls, purple/pink/blue paint, glitter, sequins, foil.
- How to Make It:
- Paint the toilet paper rolls in “magical” colors like purple or metallic silver. These are the trunks.
- Cut cloud shapes out of cardstock for the tree tops. Paint them bright pink or teal.
- Cover the tree tops in glue and dip them in glitter.
- Assemble the trees. You can add “fairy doors” to the bottom of the trunks using small pieces of foil or gold paper.
8. Forest Animal Crowns
Bring the forest inside your home by gathering your friends and pretending to be different forest animals.
- What You Need: strips of cardboard (cereal box works well), stapler, leaves (real or paper), feathers, crayons.
- How to Make It:
- Measure a strip of cardboard around the child’s head and staple it to form a band.
- For a Deer: Trace the child’s hands on brown paper, cut them out, and staple them to the front of the band as “antlers.”
- For a Bird: Glue colorful feathers all around the band.
- For a Forest Spirit: Go outside, collect fallen leaves, and glue them to the band to create a “Green Man” or nature spirit crown.
- Game Idea: Set a time limit where you only speak in the language of the animal whose crown you are wearing!
9. Recycled Cardboard Forest
Learn to reuse just like nature does! This shows how you can put together scraps of cardboard leftover from other projects.
- What You Need: Different thicknesses of cardboard (corrugated, cereal box, toilet rolls), green paint, slot-and-tab technique.
- How to Make It:
- Cut triangular “pine tree” shapes out of thick cardboard.
- Cut a slit halfway up from the bottom of one tree shape, and halfway down from the top of another identical shape.
- Slide them together to make a standing 3D tree (no glue needed!).
- Make varying sizes to represent old growth trees and saplings.
- This teaches structural engineering alongside art.
10. Nocturnal Forest Art (Black Paper Magic)
Forests can be a scary place in the dark, especially if cartoons are anything to go by! Let’s recreate the mystery of the night.
- What You Need: Black construction paper, white or yellow chalk/pastels, glow-in-the-dark stickers (optional).
- How to Make It:
- On the black paper, use white chalk to draw the outline of trees. Smudge the chalk with a finger to create a “moonlight” glow effect.
- Draw two yellow circles peering out from a hollow in the tree—who is watching? (An owl!).
- Draw hanging bats upside down on the branches.
- This helps children understand that forests don’t sleep at night; a whole new ecosystem of nocturnal animals wakes up!
Final Thoughts: The Future is Green
These forest crafts for kids are a great way to learn about the role forests play in our ecosystem and the importance of conservation.
We are currently losing nearly 6.6 million hectares of forest area per year, mostly due to human activity. By engaging the next generation in activities that celebrate trees, animals, and nature, we plant the seeds of stewardship.